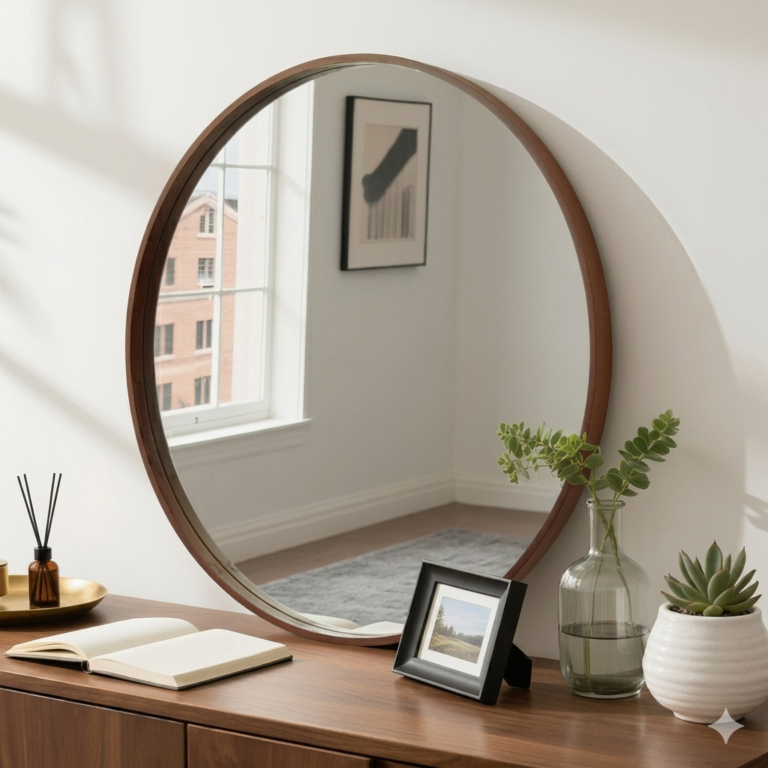
Small Kitchen Action Plan
Organize the kitchen around how you cook—not around matching containers
This eight-step plan helps you clear one problem area, measure what you have, build useful kitchen zones, and test the system before spending money on organizers that may not fit your space or routine.
Affiliate disclosure: This post may contain affiliate links. If you purchase through one of my links, I may earn a commission at no additional cost to you. Always declutter and measure before buying kitchen organizers.
A small kitchen becomes difficult to use when every cabinet is treated like general storage. Cooking tools end up far from the stove, lunch supplies are mixed with baking ingredients, and the countertop quietly becomes the home for anything that does not have a better place.
The solution is not to pull every item out at once or purchase a matching set of bins. It is to work through one friction point at a time, store items near the task they support, and protect enough open space to prepare food and clean up comfortably.
This post now owns the step-by-step action-plan role in your kitchen content cluster. Your separate Small Kitchen Organization Ideas guide remains the place for additional storage ideas and examples.
A small kitchen feels calmer when fewer things compete for the same counter, drawer, and cabinet—not when every inch is filled with an organizer.
Start With Daily Friction
Which kitchen problem slows you down most?
Choose the area that interrupts cooking, cleanup, or family routines instead of reorganizing the room from left to right.
The Complete Action Plan
How to organize a small kitchen in eight manageable steps
Work on one area at a time. Finishing one useful system is better than leaving the entire kitchen half emptied.
Choose one repeated problem
Begin with the cabinet, drawer, counter, or routine that causes the most shuffling, searching, or cleanup.
Do thisName the exact issue: “lunch supplies are scattered,” not “the pantry is messy.”
Skip thisDo not empty every cabinet simply because the project has started.
Empty only that zone
Remove the contents of one manageable area so you can clean it, see its true capacity, and evaluate what belongs there.
Do thisUse the table or one clear counter as a temporary sorting surface.
Skip thisDo not create piles around the whole room that must be finished in one day.
Remove, relocate, and reduce
Discard expired food, match containers with lids, reduce duplicate utensils, and move non-kitchen items to their real homes.
Do thisKeep duplicates only when your routine genuinely uses them.
Skip thisDo not buy storage to preserve items you already avoid using.
Measure usable space
Record the interior width, depth, height, shelf spacing, hinges, pipes, and door clearance before choosing an organizer.
Do thisMeasure the narrowest point and leave room to lift, slide, or rotate the item.
Skip thisDo not assume every cabinet labeled “standard” has the same usable dimensions.
Create zones around tasks
Group items by cooking, breakfast, snacks, coffee, food storage, baking, cleanup, and household backup supplies.
Do thisStore each zone near the counter or appliance where the task happens.
Skip thisDo not organize only by product shape if it separates items used together.
Improve access before adding capacity
Use dividers, turntables, risers, or front-access bins only when they make an existing category easier to reach.
Do thisKeep heavy and frequently used items between knee and shoulder height when possible.
Skip thisDo not stack so high that reaching the bottom category requires dismantling the shelf.
Protect the main prep surface
Choose the section of counter needed for chopping, assembling meals, or unloading groceries and keep unrelated categories away from it.
Do thisKeep out only appliances and supplies used often enough to earn permanent space.
Skip thisDo not decorate or organize away the one surface the kitchen needs to function.
Test and reset the system
Use the kitchen for several days before purchasing more products. Notice what still lands in the wrong place and change the system.
Do thisBuild a short evening reset around dishes, counters, food, and the next morning’s needs.
Skip thisDo not blame yourself when a poorly placed system fails—move or simplify it.
Kitchen Zone Map
Store items around the routine they support
The right zone reduces walking, reaching, and the number of things that must live on the countertop.
| Zone | What belongs there | Best location | Common mistake |
|---|---|---|---|
| Cooking | Everyday pans, utensils, oil, salt, and frequently used spices | Near the stove with safe heat and clearance | Keeping every pan and spice within arm’s reach |
| Food prep | Cutting boards, knives, mixing bowls, measuring tools | Near the clearest work surface | Letting mail and unrelated appliances occupy the prep zone |
| Breakfast + coffee | Mugs, coffee, tea, cereal, oatmeal, and daily breakfast supplies | Near the coffee maker, kettle, or breakfast counter | Scattering supplies across several cabinets |
| Family snacks | Grab-and-go snacks, lunch items, reusable bags, and small containers | One reachable shelf or drawer | Mixing snacks into bulk pantry backup storage |
| Food storage | Containers, matching lids, wraps, bags, and lunch boxes | Near the refrigerator or cleanup area | Keeping unmatched lids and more containers than the shelf can hold |
| Cleanup | Dish soap, brushes, towels, dishwasher supplies, and trash bags | At or beneath the sink with child-safety needs considered | Overfilling under-sink space around pipes and leaks |
| Backups | Duplicate food, paper goods, and less-frequently used supplies | Higher, deeper, or secondary storage | Giving backup inventory the easiest daily-access space |
Products That Support the Plan
Four organizer types worth considering after you measure
These are tools for specific access problems—not a shopping checklist for every kitchen.
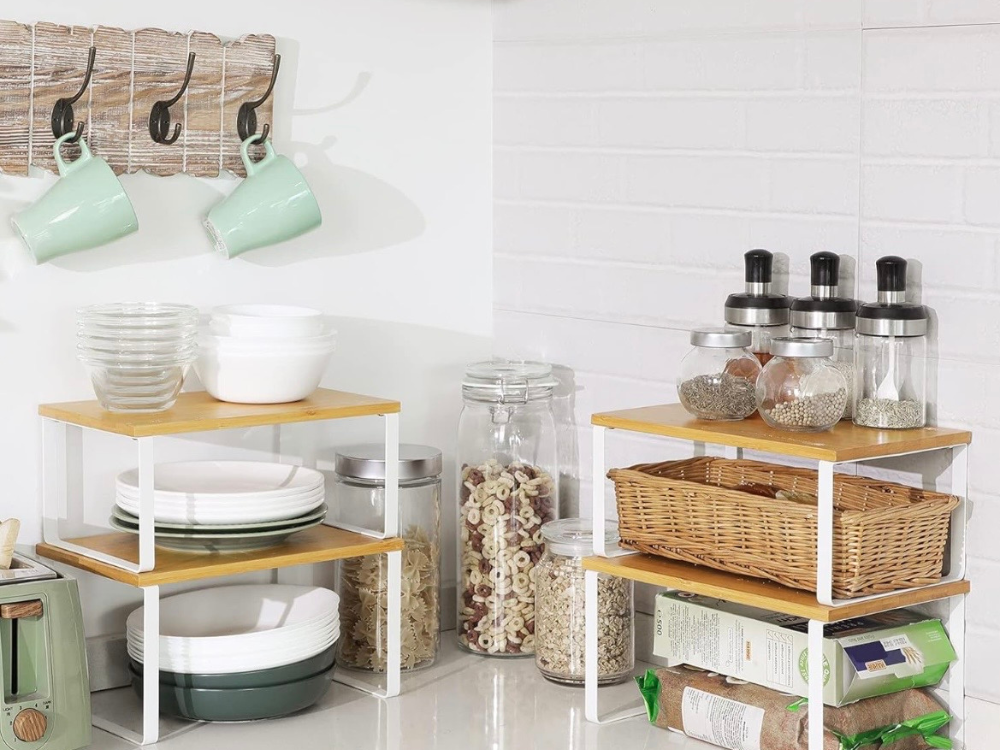
Shelf Risers
Create a second level for short stacks of plates, bowls, or mugs when a cabinet has unused height.
Best forWide shelves with unused vertical space.
Check firstInterior width, depth, shelf height, and the height of the items below and above.
Skip whenThe riser creates unstable stacks or makes the back row difficult to reach.
The original post did not include a finished shelf-riser affiliate URL, so this points to the complete kitchen list.
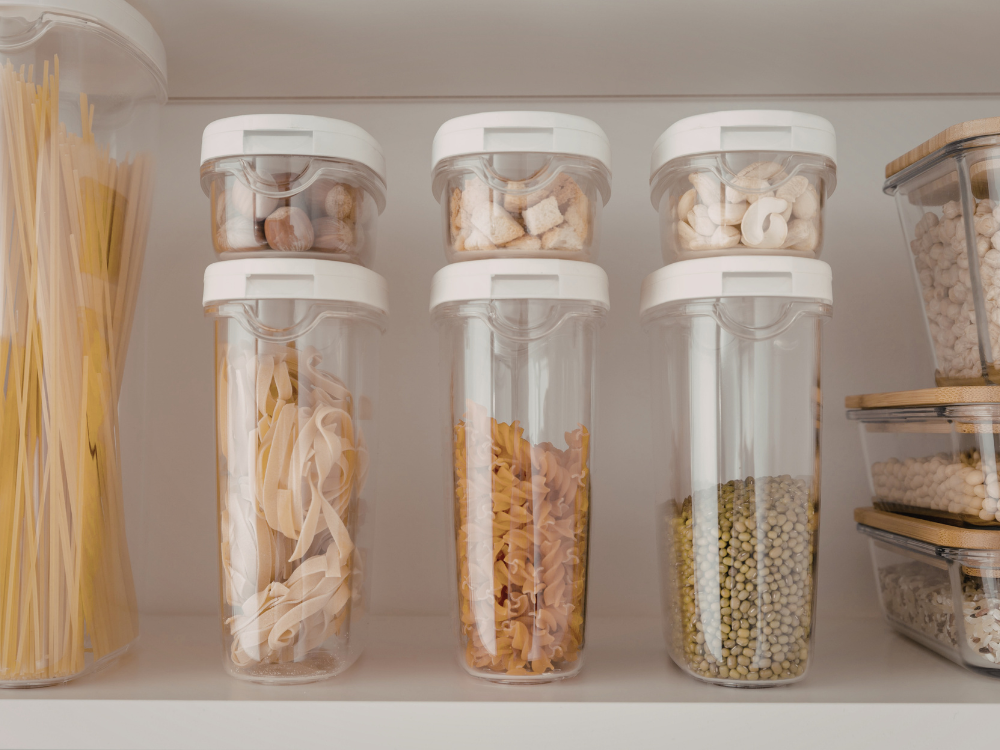
Stackable Bins
Separate packets, snacks, or lightweight pantry categories while using shelf height more intentionally.
Best forLightweight categories that otherwise become loose piles.
Check firstFull stacked height, front access, usable interior size, and shelf depth.
Skip whenYou cannot see or label the contents and will forget what is inside.
The original post did not include a finished bin affiliate URL, so this points to the complete kitchen list.
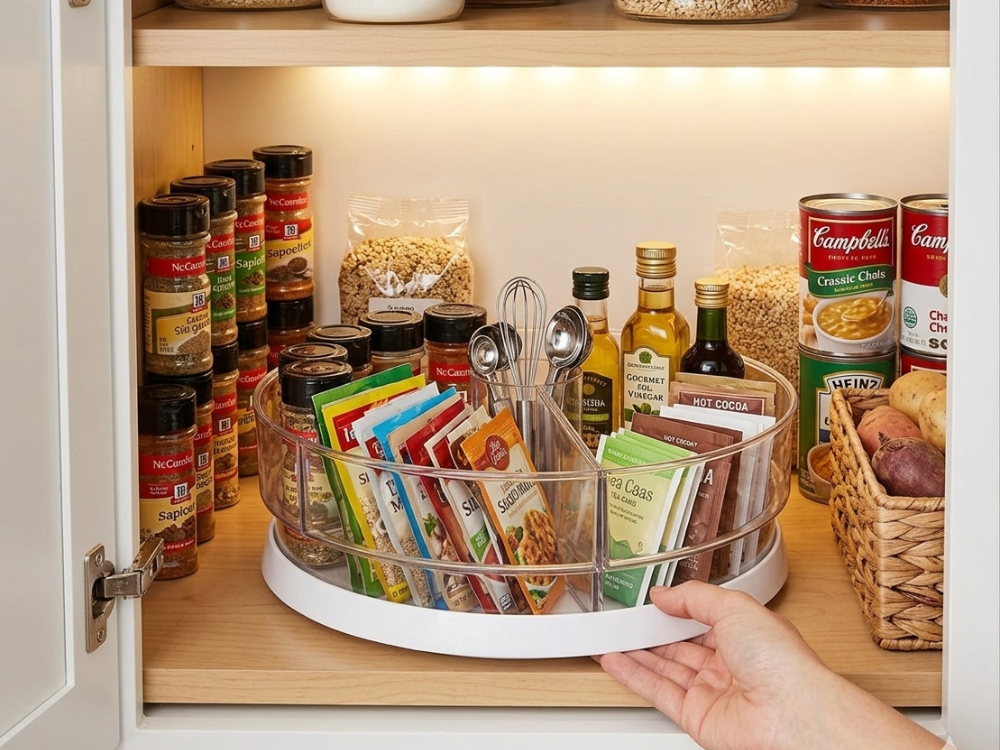
Lazy Susan Turntable
Rotates bottles, condiments, vitamins, or spices into view inside a deep shelf or awkward cabinet corner.
Best forSmall bottles that disappear behind one another.
Check firstTurntable diameter, lip height, cabinet depth, and clearance while rotating.
Skip whenThe category contains tall, unstable, or oversized containers.
Confirm the current dimensions, price, and return terms before ordering.
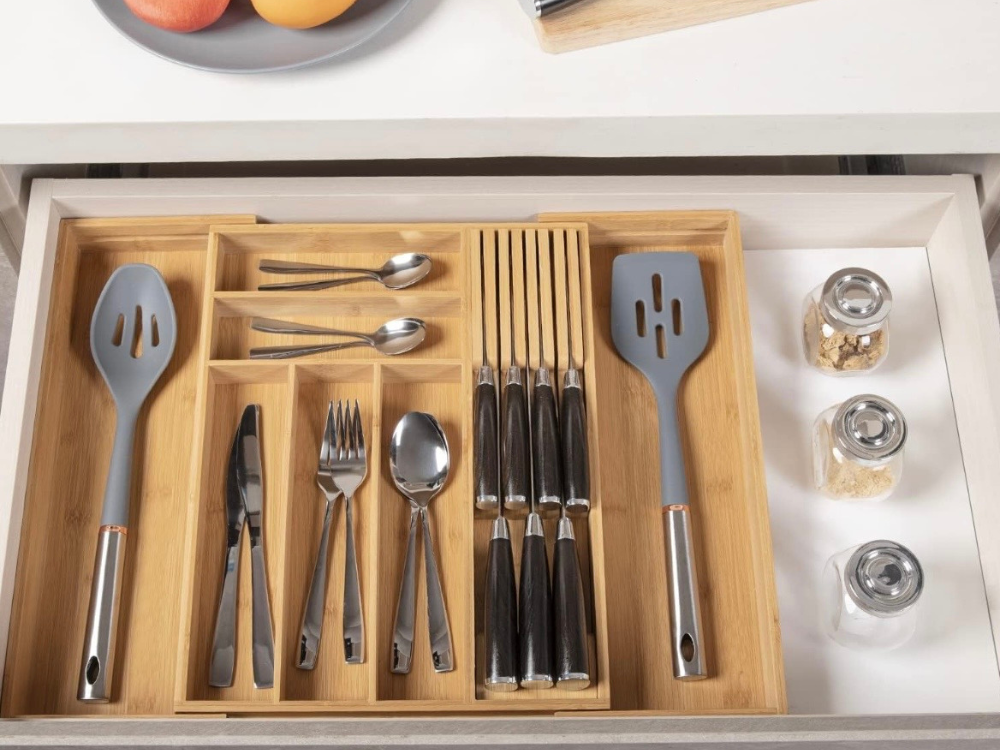
Drawer Dividers
Give frequently used utensils and tools clear lanes after duplicates and rarely used items have been removed.
Best forDrawers with mixed small tools that are hard to find.
Check firstInterior drawer width, length, height, and divider expansion range.
Skip whenThe drawer is over capacity and needs decluttering rather than smaller compartments.
The supplied Amazon URL did not include a visible associate tag. Add your tracking tag if this is intended to be an affiliate link.
Before You Buy an Organizer
Buy for access—not for the makeover photo
An organizer should reduce searching, stacking, reaching, or visual clutter without stealing usable capacity.
Usually worth considering
- A riser when cabinet height is genuinely unused
- A turntable for small bottles hidden in a deep shelf
- Dividers after a drawer has been edited
- Front-access bins for categories that need stacking
- Door storage when hardware and clearance are compatible
- A compact appliance that replaces tools you already own
Usually worth skipping
- Matching bin sets before measuring and decluttering
- Decanting every food item into containers that require more maintenance
- Risers that create tall, unstable stacks
- Counter organizers that consume the prep space you are trying to protect
- Over-door storage that stops the cabinet from closing properly
- Single-purpose gadgets that duplicate tools you already use
Turn the Article Into Action
Use the free printable for measurements, zones, and a one-week plan
The downloadable guide gives readers a practical worksheet companion instead of forcing them to remember every step in this article. That also gives the kitchen cluster a clear email-list entry point once your signup form is connected.
Keep the System Working
A realistic ten-minute kitchen reset
This is maintenance, not deep cleaning. Stop when the room is usable again.
Remove trash and strays
Discard packaging and move mail, toys, and non-kitchen items toward their real homes.
Handle dishes
Load, wash, or stack dishes neatly so the sink and main counter become usable.
Restore food zones
Return snacks, breakfast items, and cooking supplies to their broad categories.
Clear one surface
Wipe the main prep space and prepare one item that makes tomorrow easier.
Small Kitchen FAQ
Questions readers may ask before reorganizing
What should I organize first in a small kitchen?
Start with the area that interrupts a daily routine: the counter needed for meal prep, the drawer that will not open, the shelf where snacks disappear, or the cabinet that requires moving several items to reach one pan.
Should I empty every kitchen cabinet at once?
No. Empty one manageable zone at a time unless you have enough uninterrupted time and temporary space to finish the entire kitchen. Small completed systems are easier to live with than a room full of sorting piles.
How do I organize a small kitchen without a pantry?
Create pantry categories inside one or two cabinets, a measured rolling cart, or a shallow freestanding shelf. Keep daily food accessible and move bulk backups to less convenient storage.
How do I decide which appliances stay on the counter?
Consider frequency, size, weight, setup time, and whether storing the appliance would make it less likely to be used. Protect the main food-prep surface even when an appliance is attractive.
Do clear containers make a kitchen more organized?
They can improve visibility for some categories, but decanting creates maintenance and may hide expiration or cooking instructions. Use containers only where they solve a specific access, freshness, or stacking problem.
Keep It Simple, Not Perfect
Your kitchen only needs to become easier to cook in and reset
Choose one recurring problem, edit what is stored there, measure the space, and create a zone around the routine. Test it before buying more products. Then move to the next small part of the kitchen.
Continue the Kitchen Cluster
Choose the next guide that matches the reader’s problem
These links move readers deeper into the kitchen and organization content instead of sending every visitor directly off-site.